Tuesday, 25 February 2014
bought a capeline
bought my capeline from https://www.judithm.com it's an american site so shipping will be a bit more but it was quite reasonable to get the capeline ~£11. My friend paid about £20-25 for hers, so as long as my shipping is less than £9 I'll consider this a victory :)

Saturday, 22 February 2014
Hat Notes
Had a chat with our new Hat Tutor about my hat and here are some notes
We've decided it's a straw hat so I'll be looking into getting a natural straw Caplin possibly from Milliners Warehouse in Victoria or Baxter, Hart and Abraham. My Tutor is saying it should be no more than £15, but I've heard it's actually £20 or more from some of my fellow Uni students.
I'll need to block it out on a dome crown, I'll be using the biggest one we have and then possibly covering it with a couple beanies to then make it larger. There is also a possibility that I'll need to sew wire into the brim.


I'll need to block it out on a dome crown, I'll be using the biggest one we have and then possibly covering it with a couple beanies to then make it larger. There is also a possibility that I'll need to sew wire into the brim.
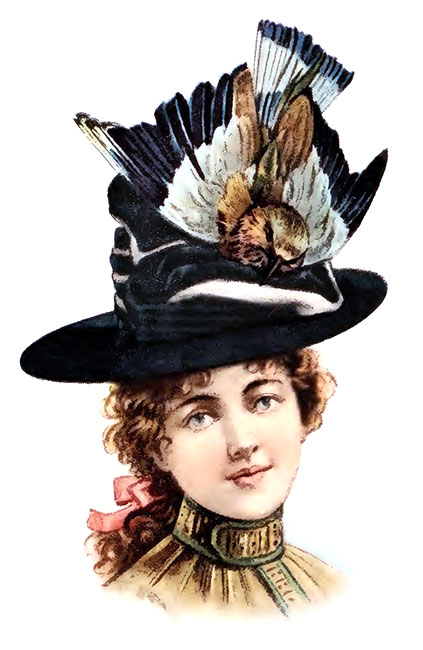

It was common in this time to decorate hats with taxidermy birds. Often times to make the birds seem more exotic they would add extra wings and feathers from other birds, and/or die the feathers different colours.
For my hat we have decided it has a bird on it, and we've talked about a few different ways of making a birds, I also have a friend who has some bird parts that she's sending me (as her father lives in the country and is one for pheasant hunting). I also have some chicken feathers from back home that i can use.
The method that my Tutor suggested was,
- to make the bird body and head out of air dry model magic, possibly embedding wire into it to make it easier to attache it to the hat, as well as to attach thing to it.
-the beak can be made out of a quill
-wings can be cut out of buckram then covered in wadding then a layer of calico perhaps to that then the feathers can be glued onto it
-when gluing on the feathers they should meet at the neck
Wednesday, 12 February 2014


A trip to Sands Films
Had a great time checking out the picture gallery at Sands Films (http://www.sandsfilms.co.uk). There wasn't quite as many pictures as I had hoped for, but I still was able to get a good amount of pictures, ideas and information. Some of the info I got was about the hat (woot woot!!), such as it is French, as most or all fashionable hats came from France at this time. I found one hat that looks quite similar to mine, it is definitely french, and it's also made out of straw and then partly covered in fabric. That's the most solid info I got, the rest of it is just reference pictures :)
It was really great to visit Sands, I haven't been there in months so it was nice to see some of the familiar faces. While I was there I also got to have peak upstairs and see some really great antique buttons, some of which dated all the way back to the 17th century!!! Most of them where pretty rusted, but you could still see some great details.


Friday, 31 January 2014
Some old but possibly helpful photo's
I recently stumbled across some photo's that I took of an exhibition at L.A.C.M.A (L.A. county museum of art). It was a wonderful exhibition on the evolution of dress and shapes, here are some photo's that are relevant to my project :)


Making my combination
I am using the pattern for a combination dated about 1878 out of the Jean Hunnisett book Period Costume for Stage and Screen: Patterns for Women's dress 1800-1909.
 I had already begun making the combination when I had a chat with Eileen and she pulled an proper vintage combination out of her bag of tricks. Once I had seen how lovely the vintage combination was with it's dainty flat felted seams, the bias binding that has been whip stitched on by the most delicate of stitches, and the clever bias binding that lay across the gathering on the rear I completely took apart my combination and started over sewing my piece together.


 isn't that just the most lovely thing you've seen, and it keep the gathering from rubbing up against the body and being uncomfortable or annoying in any way. Really though I just like it cause it's so damn neat and tidy.

I decided to do french seams opposed to flat felted like the original, for no reason other than I prefer french seams and haven't had a chance to use them yet this year as my last undershirt was all flat felted. The vintage one had a lovely bias binding machine sewed on, then it is folded around to the inside, and folded so as the seam is hidden on the inside. Then it is whip stitched on from the wrong side, leaving the line tiniest of stitches showing of the right side of the garment.
 Making my bias binding. I've cut out 2" strips on the bias to make 1" single folded bias binding.

 here you can really see the small lovely detail of the stitches. The vintage one also has darts in it, I don't think I'll be putting darts in mine. Instead it will have lace stitched on around the neckline and waist, then I will weave ribbon through the lace to create a cinch. This way the combination won't be as limited, and can fit many different people, and/or grow/shrink with the wearer if they gain or loose weight.
 Here's one side of my combination after the bias binding has been sewn on, folded over, pressed, pinned and ready for hand stitching.
  I am SO please with how my whip stitching turned out, it actually looks a bit better than the original if I do say so myself :) it took about 2hrs and 30-45minutes to hand stitch everything that I needed too. That's about 96inches of stitching, and it takes me about 1.4-2 minutes to stitch an inch depending on how I pace myself. Totally worth every minute of it!
Monday, 27 January 2014
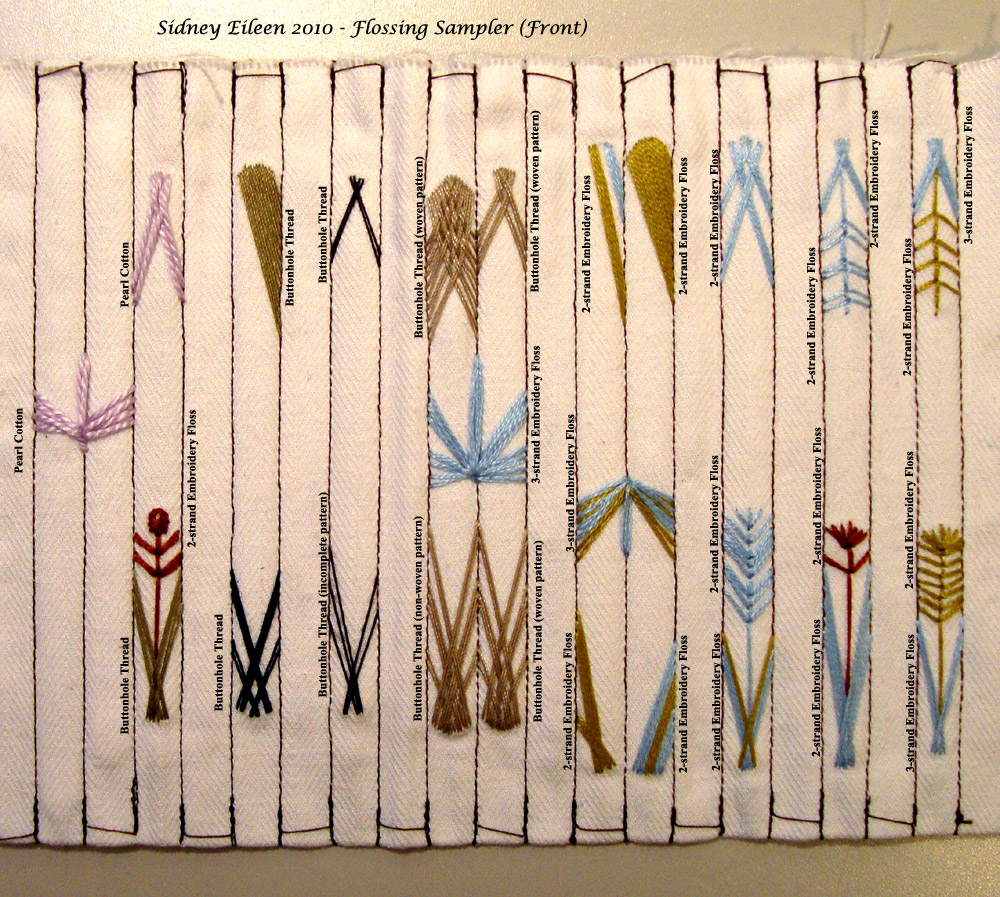
Corset Flossing
Some sites and food for thought in regards to flossing my corset
http://www.foundationsrevealed.com/index-of-articles/free/beginner/67-the-basics-of-flossing
http://sidneyeileen.com/sewing-2/sewing/corset-detailing/flossing/#.UubRWnk4nR0
 http://www.pinterest.com/ladyjaynes/embroidery-flossing/
http://www.foundationsrevealed.com/index-of-articles/free/beginner/67-the-basics-of-flossing
http://sidneyeileen.com/sewing-2/sewing/corset-detailing/flossing/#.UubRWnk4nR0
Subscribe to:
Posts (Atom)